The first book I ever shared with my writing group in full was Machine.
By that time I’d already been editing it and buffing it for at least five years, so a lot of my work process at the time was just posting the next chapter and taking notes.
I’ve learned a lot about editing since then. A good analogy I’ve stumbled on to describe the process is drawing. Because similarly to writing, it takes time, progress and order. Both must be done in stages.
Now, because it’s fun and I wanted to draw something, I’ll walk you through what that process looks like.
Idea
This stage is pretty straight forward. It’s just deciding what you want to create. As my friend Alma says, it’s like a seed. For me, it could be a concept I want to explore, a moment I want to have between characters, a setting, a plot point, hobby, or even just a character by itself. For the purposes of this blog post, I posted an intensely brief survey on Facebook (first comment takes all) to choose. The winners were Ara and Hoyt, a husband and wife from my book Equilibrium (poor book doesn’t get a lot of attention on here or in my editing schedule, though it probably should for its strengths), so we’ll go with them sharing a tender, family friendly moment.
Basic shapes
This stage can look different for everyone, especially depending on if you’re an outliner or a “pantser.” In either case, this is where you start to feel out the basic shape of your story. I like the idea of describing it as a shape, because it suggests there really is a way it should go. You just have to find it.
For me, as a pantser, this means writing everything out (rough draft), then cataloging the plot. Working with my second (or sometimes rough if I know something is really off) draft and that plot, I then make adjustments, working my way through until the story is nice and tight and the shape I want it to be. If you’re an outliner, the process is similar, but with a lot less work upfront.
And since I’m drawing this while I write, a few other similarities I noticed are as follows:
- Both involve a great deal of structural work up front. This makes a giant mess, but cannot be skipped or assumed. Even though a lot of it won’t shine through in the final image directly, and would actually make the work worse if it did, it is crucial to the success of the piece. The artist must know what’s going on underneath.
- Sometimes you have to start over. It took me three drafts to get a foundation I liked, the main problem being, of course, the bones. If the anatomy is wrong, if the bones really don’t fit, sometimes you really do just need to start a new page. It hurts if you’ve sunk a lot of work in already, but believe me, you will be happier in the end. Hold things loosely and remember, the faster you learn to let things go, the faster you’ll improve.
- Write what you know. Anatomy is really hard to draw well (as is writing a story). Sometimes you need a little help from real life to show you what something feels, looks, or sounds like. For this project, for example, I used my mom (thanks Mom!). We hugged, I worked out the anatomy of how arms and shoulders work, and boom, I was better equipped to draw.
- Changes cause ripples. Just like bones in the body, plot points are connected. If you change one thing, you are going to have to change another. Also like in the body, you (and your reader) will notice if the structure is out of joint. It’ll be obvious and it will hurt. Fix it until it doesn’t.


Detailing the structure
Once you’ve got your bones in place, it’s time for cleanup. In drawing this looks like refining your shapes, making your first attempts at line art, and getting rid of the extra structural lines you used before.
In writing, it means massaging those last few story tendons into place; erasing extraneous scenes, background structure, and exposition; and doing your first cleaning of the writing itself, such as making sure your point of view is correct, your tenses match, and you aren’t cluttered with adverbs. You can start adding more character and voice too, laying on your first layers of style. I’ve left a few structural pieces in the drawing to show changes I made to the overall structure, but ideally by the end of this stage all of those would be gone.
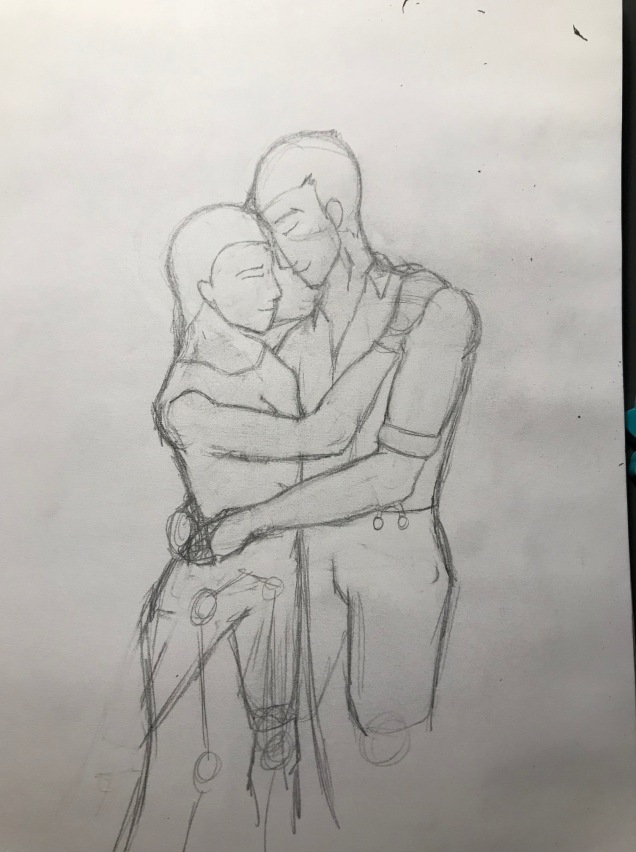
A few notes from drawing:
- Even though most of the structure is nailed down, there will always be those tricky spots you have to restructure and redraw again and again. In this drawing, Ara’s left arm and head had to be redrawn several times to get right. It caused more ripples that went all the way down to her legs. That’s okay.
- This is a good stage to start showing the work to others. Whether writing or drawing, at this point there’s enough there that I can show them what I was going for while still allowing for feedback. You should be careful who you show it to, sticking to people who are more familiar with you or your work/know the kind of feedback you’ll need, but it is helpful to show them now before you’re too much farther/committed. It can save you a lot of work later down the line.
- Not everything has to be perfect. I’m not good at drawing hands, so at this stage, I left them as vague paw shapes. The people I showed this to know I’m not good at hands, but trusted I would get to it later. Don’t waste time mastering details that may change anyway.
Polish, polish, polish
After doing a nice rinse and repeat of restructuring, minor detailing, and getting feedback for a few drafts, it’s time to start adding in the final details. This should be the stage where the structure is fully set and where you really start to nail in details word by word. If there are areas you left for later, go back and fill them in.
Also, if there are any messy smudge-marks or words leftover, get them out of the picture. Adverbs, resting words, sentences that don’t add value. If they don’t have a reason to be in your story, kick them out, especially if you think they’re pretty or witty.
Lessons from drawing:
- This is usually where fatigue comes in. I’ll be honest, at this stage I even had to take a break. That’s okay. Rest if you have to and don’t be sloppy just to finish.
- Tackle your weaknesses. It’s painstaking and frustrating to have to erase and redo the same set of fingers or paragraphs over and over again, and it’s hard to feel like you aren’t improving, but believe me, you are! Artists get to where they are by practicing. Writing is the same way. Get feedback to help you find those weak spots and tackle them head on!
Finish
I didn’t have a picture for the last step, because I realized once I was finished polishing, I was done. Writing is the same way. You can edit forever. But if you really want to succeed, at some point you’re going to have to decide if it meets your goals or not. If it doesn’t, keep going or begin again. If it does, stop. For example, with this drawing, I don’t need to ink it, I didn’t want to add color, and I’m okay with having some anatomical flaws. I wanted to have a decent picture of two folks snuggling, and I do.
This can be the hardest part for a variety of reasons, but I’ve found a few tips that help me move on.
- Know that it gets easier with time. As you grow in feeling out structures, your style, and what details you need to include, it will get easier to know when a story is done.
- Have goals. Know what level of quality you want to achieve, for whom, and why, and stick to it. Knowing your audience and purpose can help with this.
- Be okay with process. Learning how to write or draw takes a long, long time. If your skills can’t reach your goals yet, keep trying. Modify your goals in a way that gives grace and space to grow, and, if you really can’t modify your goals for your current project, work on something else until you can reach them. Don’t give up.
So, that’s all I’ve got for now. Thank you for sticking with me for such a long post. I hope adding the pictures helped break it up for you, and as a reward, the final product: Hoyt and Ara sharing a cuddle. Questions for you, dear readers, posted after the photo.
Ara and Hoyt Longmar copyright Abigail Morrison, 2018.

So, what do you think? Does the analogy work or no? Have you found better ones to describe your process? What does it look like and why? If you have answers to that or pictures of your own characters, feel free to post either below! If you’d like more content like this, feel free to follow the blog or the social links on the sidebar.

